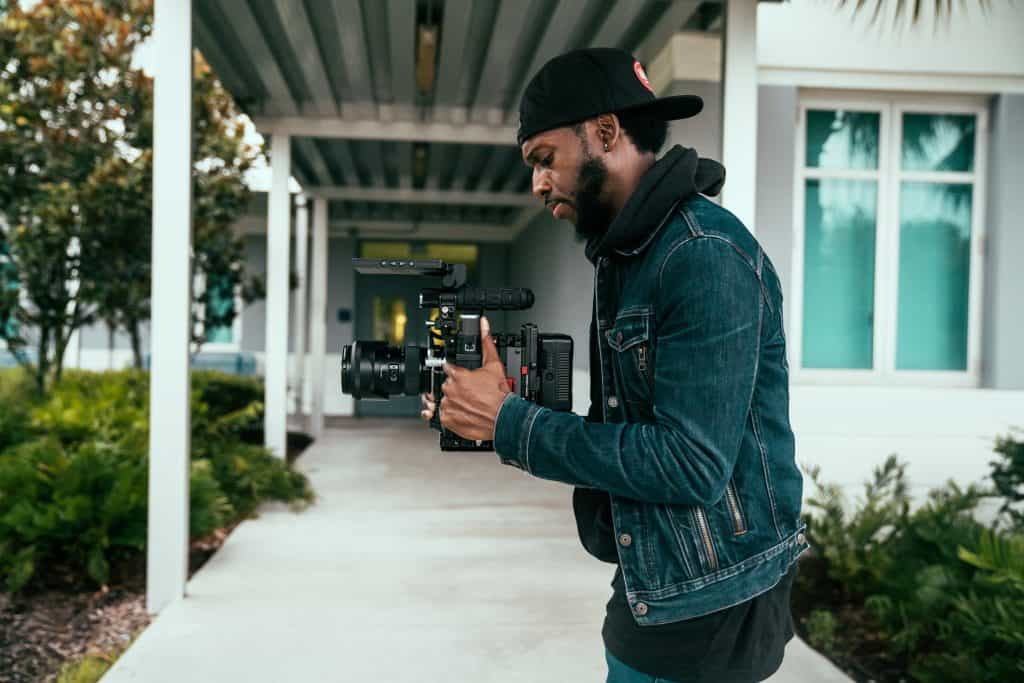
Have you considered working as a lone photographer during a wedding? When first starting out, it's fairly uncommon to work alone or with a small crew. Here, we'll discuss several tips for shooting a wedding independently of any helpers.
It's much easier to get high-quality shots if you have a second shooter on hand. However, it is possible to shoot a wedding solo. You should manage your time and equipment for professional photography to record the ceremony.
Wedding photographers, in particular, are known for frequently working in groups. Because of this, they are able to record every crucial second without missing a beat. On the other hand, photographers often have to operate independently.
So how does a wedding photographer shoot alone? We are going to be taking a look at the different ways this is possible, and bringing you up to speed on how a solo wedding photographer will work.
If you’re looking for the best Video Company in Melbourne then look no further. Check out Vines of the Yarra Valley’s ultimate list.
Table of Contents
Here are some guidelines to assist you in shooting a wedding by yourself.:
To meet deadlines, you should set realistic goals and prioritise accordingly. Time constraints for a ceremony call for careful job allocation while filming alone.
You should make a list of the images you want to take and cross them off as you take them. It's a kind gesture, and it'll reassure the bride and groom that their loved ones are taken care of.
Before, during, or after the ceremony, take photos of the couple's rings, jewellery, and wedding attire.
Advise the Coordinator
Coordinator may be a part of the party, the groomsmen, a close friend, or a part of the couple's family. While they won't be able to assist you with the actual photography, you will have aid coordinating the guests at the wedding.
The coordinator is available for discussion of planned shooting times and locations. Your ability to communicate with one another will prove invaluable throughout taking the shots alone.
In order to ensure that you and the couple have the same expectations for the photo shoot, it's a good idea to go over a few questions with the client before the ceremony.
Check the Location
When shooting a wedding on your own, you should make sure you know where the ceremony will take place. You can pick out and mark prime locations for taking photographs. Have the couple meet you at the wedding site the day before the big day to go over location-specific poses.
If you're familiar with the location, you'll be in a much better position to take photos, as you'll know just where to go to get the view you want.
Be Confident
It's best to just start snapping images wherever you are. If you're there on your own to record the ceremony, you'll need to ask people what they're seeing and hear. Communicate with your invitees and request the poses.
Ensure that you have enough coverage to include everyone who has been invited to the wedding. The couple should be asked to pose for group photos with their loved ones. Don't be afraid to ask for specifics in regards to the photography equipment you will require.
Light and Camera Settings
Whenever you're taking photos while moving around, increase the shutter speed. You should take many shots, but adjusting the camera settings one by one could be time-consuming. It is suggested that the ceremony be photographed using manual settings adjusted for the available lighting at the location.
Preparation
So, if you're the wedding photographer for a company like Wure and you have to shoot alone, you should get ready ahead of time. In-depth pre-event analysis is the surest approach to guarantee success.
To accomplish this, you should visit the venue a few days ahead of time to inspect the lighting and visualise the final product. It's important to pause and plan out your aesthetic, location, and shooting angle so you can get the most out of your photos.
It's a lot to process all at once.
Have a Checklist
Creating the high-quality content that your audience craves is much simpler when you have a checklist to follow.
Many one-person photography businesses specialise in weddings, and their photographers have both a "must-have" list of photographs and a "wish list" of additional photographs they would want to take. They use a checklist to ensure that every detail of the wedding is perfect, and to stay on track while they work with the bride and groom to achieve that goal. They have to do everything themselves because they don't have an assistant or teammate to help them out.
In this respect, it is helpful to coordinate with the bride and groom and inform them that you are working the venue so cheaply that all requests must be submitted to you, and that while you will get everything, it may not be done in the way they originally envisioned or in a way that fits with their preconceived notions about the wedding photography process.
Trust Your Skillset
Taking wedding photos on your own can be a daunting task. It's not only a test of your skills, but also of your self-assurance and your capacity to perform well under pressure. You're the only one who can shoot the photos, so a lot of pressure is on you to get the shots you want. This pressure, along with inexperience, might paralyse less skilled photographers.
Therefore, confidence in your skills and ability to complete the task at hand is crucial. Keep in mind that the quality of what you do supply will remain consistent with what you've always made. We recognise the difficulty of the situation. Those who have become accustomed to teamwork may find it particularly challenging to adjust to working independently.
But you'll be able to and you will succeed. However, keep in mind that you, like everyone else, are merely mortal. Introduce yourself to the other visitors and people there. You'll feel better about yourself and contribute to a more positive environment if you can connect with your subjects and collaborate with them to produce amazing photos.
Things to Know Before Shooting a Wedding
Acquire additional shooting experience
One might not be prepared to shoot a wedding on their own if they had never assisted another photographer at a wedding. Unlike portrait sessions, there is no room for error on the day of the wedding. The workplace is not the place to acquire new skills on the first place.
To hone your photography abilities, seek for a local mentor to "second shoot" with.
Keep in mind that by contacting established photographers, you are asking them to take time away from their busy schedules and that they are under no obligation to assist you.
Close online monitoring of a photographer's activities increases the likelihood of establishing a fruitful working relationship with them. Send thoughtful responses to their articles, photos, and status updates on social media. Don't creep them out, but do be nice and supportive. Doing so will aid in making your brand more recognisable.
Send them an introductory email after you've been encouraging them for a while. Tell them who you are, what you want, and why you adore what they do.
Remember that no one have the time to read a novel-length email.
In the email, make exceptional offer, such as offering your services a second shooter or treating them to at their favourite restaurant when it's suitable for them. Prove that you are well-prepared, value your time, and would be a pleasure to take part by answering their questions thoroughly.
If you persevere, you might get to know other photographer and end up with a terrific friendship and some useful contacts along the way. Some of popular photographers have gotten in touch with me this way. I still communicate with them regularly.
Looking for a Video Company in Melbourne? Check out our ultimate list of videographers here.
Choose your pricing strategy
Knowing your expenses will help you determine a fair pricing for your photographic services. Creating a detailed budget regarding your photography business should be your first order of business. Consider all the regular bills you pay each month or each year. Once you have an accurate picture of your expenses, you can determine how much revenue you must generate to stay in company.
Your next step should be to decide the volume of weddings and portrait sessions you wish to photograph annually. One way to calculate your total profit is to divide your income per work by the total quantity of jobs, such as weddings or portrait sessions.
Set clear guidelines for the bride and groom.
Discuss the specifics of your photographic package with your photographer well in advance of the big day to ensure that everyone knows what to expect in terms of delivery of photographs and usage rights.
Plan ahead by writing down your agreements and setting clear parameters for everyone's behaviour.
To what extent may you use these pictures on your website? (This is a must-have clause in any contract!) Do you want to have dinner at the party? To prevent confusion, make sure to note every detail and go through it with the client.
Locate Potential Locations Early
You should visit the areas ahead of time so you can get a feel for the venues and places of interest in your area. Thinking quickly on one's feet is a skill that may be honed with practise; in the meantime, relax. Pre-trip site inspection is a must!
Pose ideas for the a) bride & groom, b) wedding celebration, and c) family members might be generated by strolling about the venue or location. Try to find shots with unique lighting, textures, and even shadows. Go there at the same time of day that you plan on taking portraits there. In this way, you may be sure that the lighting is the same as it will be on the wedding day.
Create a Shot List & Get Inspired
Wedding photography, like any other craft, can be mastered with experience. If you're just starting out, however, it's a good idea to make a detailed list of the photographs you hope to take and try to commit it to memory. The list is quite useful in the start, but as you gain experience, you'll know when to stop using it.
Stock Your Gear Bag
Send a photography questionnaire for the wedding day.
Backup equipment is very important on a wedding day – it’s not worth the risk to show up with only one camera! I recommend photographers pack the following items in their gear bag:
- Two full-frame camera bodies
- 2 or 3 lenses
- Two camera flashes
- AA batteries for your flash
- batteries for your camera
- memory cards
If you're just getting started and don't yet have the capital to buy all of the above, there are plenty of places, both locally and online, where you can rent equipment instead. If you're getting paid to shoot weddings and your revenue is rising, it makes sense to invest in better equipment as you can.
Craft An Efficient Timeline
Inquire about the client's anticipated wedding day schedule when they first book your services. When do the wedding and the reception begin? Have they decided whether or not they want a First Look before the ceremony? Where do they hope to shoot their wedding pictures? I would use the information given to me to create an example timetable.
Send a wedding day photography questionnaire.
We also suggest creating a wedding day questionnaire to supplement the conversations having with your clients.
While some of the material presented here may have been covered elsewhere, this is the perfect opportunity to compile all you might need in one convenient location.
We suggest that you receive Signature Edit's Wedding Timeline Questionnaire if you are unsure of how to begin planning your wedding or if you are inquiring for the proper items. All the pieces you should ask the correct questions are provided in there.
Check out our post on What should a wedding video include?
Talk with the wedding planner.
You should get in touch with the wedding planner if your clients have hired one or if one is included in the package for the venue. Depending on the wedding planner, this could be done in preparation for the big day or on the big day itself.
Having a wedding organiser, especially one who is readily available and skilled at their job, may make a huge difference.
But suppose the couple didn't spend the money on a wedding planner.
This is a common occurrence at the weddings we photograph. The best wedding planners will charge you thousands of dollars to help organize your big day. Unless your clients have a sizable wedding budget, hiring a coordinator may be out of the question..
Don't worry if you don't have this supplementary help on your wedding day.
Alternatively, there is a straightforward method that can be used...
Your clients should appoint a contact person in advance to help with day-of coordination. This will probably be a member of the party's immediate family or a close friend. They won't (or shouldn't) be responsible for every aspect of everyday coordination, but they can ease the burden at the busier times.
This method is used so that we always have a "go-to" individual to assist us round up the family for photos. Because we can't possibly memorise the appearances of everyone in the world, doing this with your self is a challenge.
As a final piece of advice, know that it will be challenging to put into practise.
When you're still learning and developing your abilities, it can be extremely challenging to feel confident.
We felt like we were living the motto "Fake it 'until you make it!" for the first few years of our wedding photography career.
That quote contains a lot of truth. There will be times when you are at a loss for words. There is a lot happening at a wedding, and it is always changing. You can only do the best you can, so trust in what you do know and be flexible.
As you gain experience photographing, we can share the following advice with you:
To take wedding photos will become less of a hassle.
You'll get the hang of things and find it much simpler to adjust to your new environment as you learn to recognise the common patterns that crop up again and again.
To handle the social aspects of wedding photography, we introverts have had to develop several skills, including the ability to successfully communicate, the willingness to lend a hand when needed, and the confidence to say "no" when a request will get in the way of our work. And we wouldn't give that up for the world. Photographing weddings is a fantastic hobby.
In conclusion, there are a variety of options open to the lone wedding photographer. But trusting in your own abilities and realising that other people are fallible and therefore anticipate less than ideal results from you is crucial. You should always put the needs of your clients and customers first, as they are the ones who have chosen to work with you. Everything else will work out if you can pull that off.
Conclusion
In the wedding photography industry, it is common practice for photographers to collaborate on shoots. A wedding can be filmed with as few as one cameraperson and no additional crew. In this article, we'll talk about some things to keep in mind if you're shooting a wedding without an assistant. If you want to get everything done on time, you should set reasonable goals and prioritize your workload. If you're going to be shooting the wedding on your own, be sure to scope out the venue beforehand.
It is possible to pick out and mark promising areas for taking photographs. You should meet with the couple the day before the wedding at the venue to go over appropriate poses. The only surefire way to ensure success is with extensive planning in advance. Believe in yourself and your abilities and you will succeed. A wedding day, in contrast to a portrait session, leaves no room for error.
Find an experienced person in your area to "second shoot" with. Don't bother well-known photographers with requests for their time. Finding a reasonable price for your photography services requires an understanding of your costs. The first order of business for your photography company should be making a thorough budget. Make a yearly goal for the number of weddings and portrait sessions you'd like to photograph.
Communicate with your wedding photographer early on to set realistic expectations. Capturing the perfect wedding moment is a skill that can be honed with time and practice. When first starting out, it's helpful to create a comprehensive list of the types of photographs you intend to take. It's not wise to show up to a wedding with only one camera, so be sure to bring along a backup. The best wedding planners can add thousands to your wedding budget.
Your clients may not be able to afford a wedding coordinator unless they have a sizable budget. A point person should be designated by your clients in advance to aid in day-of coordination. Being confident is difficult to achieve when you are still growing and learning. Trust in what you do know, and be adaptable, because that's all you can do. At a wedding, there are many moving parts and many unexpected developments.
Content Summary
- Have you considered working as a lone photographer during a wedding?
- Here, we'll discuss several tips for shooting a wedding without an assistant.
- Having a second shooter with you is a great help to take good photos.
- However, it is possible to shoot a wedding solo.
- You should control your time and photography gear to capture the ceremony as a pro.
- It is important for you to check the location of the wedding when shooting solo.
- Take the couple to the venue a day before the wedding and discuss the poses according to the location.
- To hone your photography abilities, seek for a local mentor to "second shoot" with.
- Make connections with other photographers to improve your abilities.
- Creating a detailed budget for your photography business should be your first order of business.
- You should visit the areas ahead of time so you can get a feel for the venues and places of interest in your area.
- We suggest that you receive Signature Edit's Wedding Timeline Questionnaire if you are unsure of how to begin planning your wedding or if you are even asking for the proper items.
- Check out our post on What should a wedding video include?Talk with the wedding planner.
- You should get in touch with the wedding planner if your clients have hired one or if one is included in the package for the venue.
- Unless your clients have a high budget, a wedding coordinator might not be in the cards.
- When you're still learning and developing your abilities, it can be extremely challenging to feel confident.
- As you gain experience shooting weddings, we can share the following advice with you:To take wedding photos will become less of a hassle.