
Table of Contents
Wedding Dress Timeline: Monthly To-Dos to Perfect Your Bridal Look
Timing is everything when it comes to finding "the one." Here are the dates by which you absolutely must have your wedding dress.
As long as you can remember, you've probably been fantasising about your wedding dress. Plan ahead and shop for your wedding dress early so that it fits your vision perfectly on your big day. We have included everything you need to know about wedding gowns in this comprehensive chronology.
Our timeline for wedding gowns is suitable for the typical engagement duration of over a year. The schedule is adaptable; just shorten the engagement period to fit your needs. (And if you're just starting to think about your wedding dress with fewer than nine months to go, you might want to put more of your attention towards finding an off-the-rack gown or scoring a dress at a sample sale.)
FAQs About Wedding Dress
The tradition is based on an Old English rhyme that dates back to 19th-century Lancashire. It describes the items a bride should have on her wedding day: "something old, something new, something borrowed, something blue, a sixpence in your shoe."
Wear it on your right hand: While tradition suggests the ring should be worn on the left, placing it on your other hand won't be a big problem. This means you get all eyes on your wedding ring and after the ceremony, you can pop your engagement ring back onto the wedding finger.
When it comes to color choices, navy is the number-one most requested color for the mothers of the bride and groom. Other popular colors include blush and shades of nude. Traditionally, you want to avoid white, black and red.
It's encouraged to steer clear of wearing white, blush or neutral hues that can look white on camera unless specifically approved by the bride. These shades may look similar to the bride's wedding dress, and it's always best to avoid any color mishaps.
There's not one specific color the mother of the bride should wear. It's generally best to steer clear of white, ivory or champagne hues as to not take attention away from the bride.
Here's Your Complete Wedding Dress Shopping Timeline
12 Months Before Your Wedding Day
The excitement of getting engaged can make you want to rush out and buy a wedding dress, but you can save yourself time and stress by planning ahead. Get these sorted out at the twelve-month mark and you'll be well-prepared to go shopping when the time comes.
Determine Your Wedding Venue and Date
For example, a garment that might look stunning in a fall or winter wedding can be completely inappropriate for a spring or summer wedding, so knowing your wedding date in advance is crucial. You'll need a firm date in order to make preparations. Similarly, it's helpful to know the location of the wedding. The wedding location will have a favourable impact on your personal decisions, just as the wedding day will. What looks great during a relaxed beach ceremony may not work so well at a formal dinner reception.
If, on the other hand, you've always imagined yourself in a certain wedding dress, you can reverse the order of events and let the garment itself determine the ceremony's time and location. If you've always imagined yourself walking down the aisle in long, lacey sleeves and a faux fur muff, a winter wedding may be the best option. Or, if you've always envisioned a more understated image, complete with a simple, flowing dress and a flower crown, the beach or a field would be perfect.
In short, you can do whatever you want, as long as your dress fits in with the theme of your wedding.
Set a Budget for Your Dress and Accessories
Determine how much of your wedding budget will go towards the dress after you've established a total. Add in the price of taxes, changes, and maybe even delivery on top of the suit price.
Wedding dress buying is not something to begin without a set amount in mind. The thought of falling in love with a wedding dress that is out of your price range is heartbreaking. To save time and energy while wedding dress shopping, set a budget right off the bat. Don't forget to add in the price of modifications, tax, and shipping (if any), as well as any additional items you might need, like a veil, slip, or shoes, for your big day.
Do Your Research
Figure out your desired aesthetic before you go shopping. The location will be a big factor in making that decision. A seaside wedding calls for a dress that can float and isn't too fussy. Having your wedding at a five-star establishment? Your outfit choice can be a formal ball gown. Find out what cuts work best with your proportions as well. Then, peruse magazine and internet bridal fashion spreads, cutting out and saving your favourite designs.
Wedding LookBook by The Knot is a fantastic resource, allowing users to browse hundreds of dresses by price, silhouette, and more, and then locate bridal boutiques in their area that stock the selected styles. Instead, you may find bridal salons in your neighbourhood by searching our marketplace.
Even while doing lots of research will help you limit down your choices, try to maintain an open mind. You can locate the perfect dress for your budget and body shape with the guidance of a professional adviser; you might even wind up adoring a whole different style of dress than you first thought you would.
Use Pinterest to Make a Board of Things You Like
It is not necessary to have a specific dress style or silhouette in mind before beginning your search; however, it is helpful to have an idea of what you like and don't like in a dress. A vision board, whether physical or digital, can be helpful (and entertaining!).
Choose Your Shopping Mates
Go clothes shopping with your mum or a close friend, but don't bring more than two or three other people with you. Dress purchasing might be made more difficult by the presence of too many viewpoints.
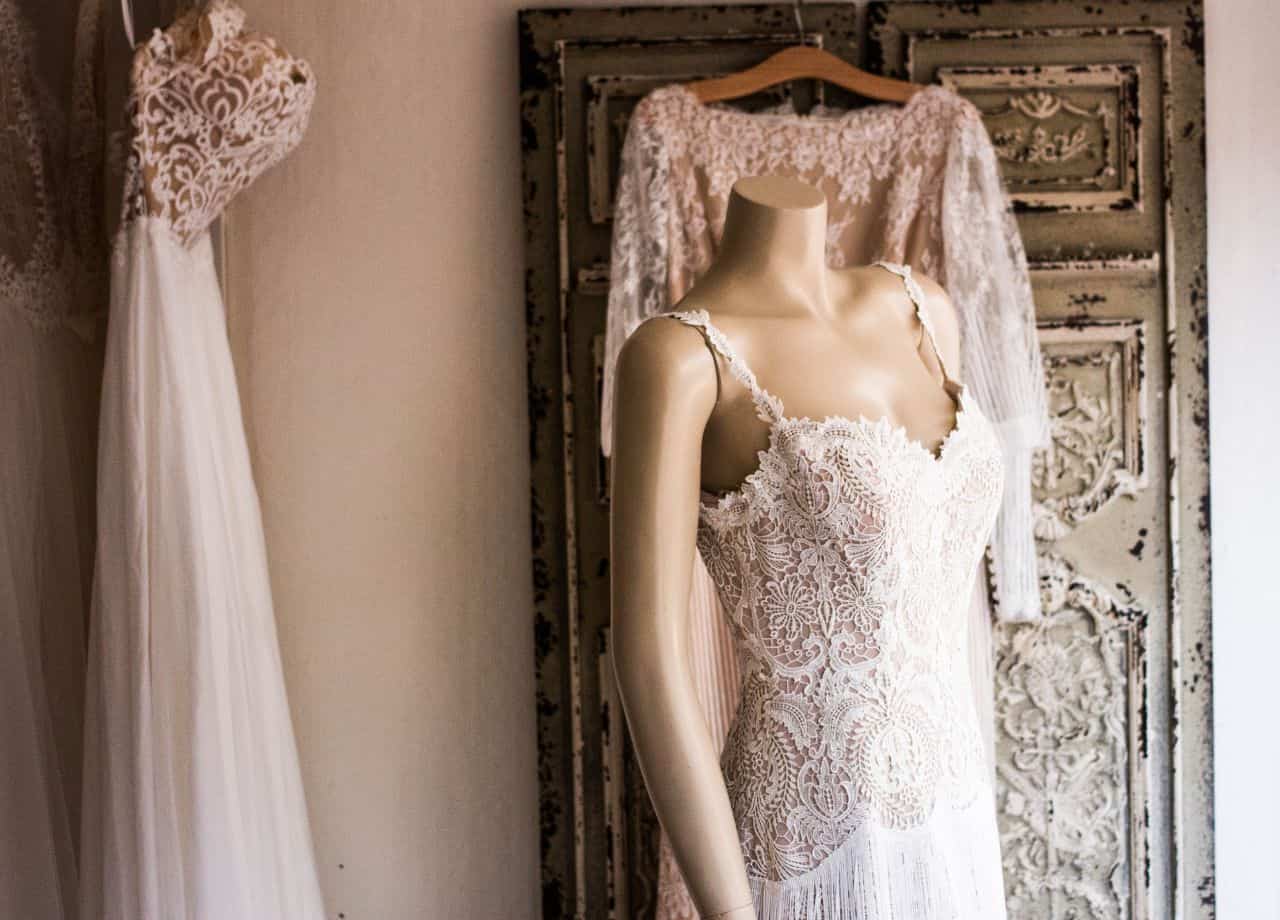
Go Wedding Dress Shopping
As your wedding dress will not be something you can simply pick up off the rack, you will need to start looking for it well in advance of your big day. That means you're looking at a few months of labour to make and a number of adjustments to get it just right for your figure. It's best to make your appointments early, as hair salons tend to fill up quickly. Bring pictures of clothes you like to the bridal salon so the salesperson may better assist you. Check to see if a salon near you is hosting a trunk show (a travelling presentation of a full collection) by the designer you have your eye on.
11-10 Months Before Your Wedding Day
Start Your Dress Search
Remember when the bride took her best girls wedding dress shopping on Say Yes To The Dress? Although it appears to be entertaining, the onslaught of feedback can quickly spiral out of control. You might want to think about bringing as few individuals as possible. If you can't stand being around anybody else, stick with your mum and grandma, your spouse's closest relative, and your most loyal and accepting best friend. No one's opinion is required and can exacerbate an already difficult happy occasion. Consider going out on your own if you want to do some shopping. Since you'll probably be making numerous journeys, you can switch up who you bring with you to the store.
Compare fabrics and cuts while you shop to find your style sweet spot. Things that looked great on Pinterest might not work for you.
If you want to see what you like best, try on a variety of fabrics and styles of dresses. Try on as many dresses as you can; you never know which one will feel like a dream or which one will turn out to be your hidden jewel.
8-9 Months Before Your Wedding Day
Make a Final Decision and Buy Your Dress
Time to make a decision and place the order. And while nine months out may sound excessively early, it's not; wedding dresses are often custom-ordered, so you'll need to give the designer plenty of time to construct and ship the dress, as well as allow for adjustments, which are necessary for nearly all wedding dresses.
When you feel like you never want to take it off again, you know it's the one. The standard procedure for purchasing a gown involves signing a contract and making a deposit equal to roughly 60% of the total cost of the dress. Because of the time and effort involved in making your custom garment, designers require deposits before beginning production. Verify that the contract is complete and accurate before signing it. Salons typically call customers 16 to 20 weeks after they place an order, so be sure to enquire about when you can expect your dress to arrive.
5-6 Months Before Your Wedding Day
Figure Out How Your Wedding Day Hairstyle and Choose a Wedding Veil
The way you wear your hair on your big day can make or break your entire ensemble. You've already chosen your dress, so knowing what you want well in advance is ideal. Do you plan on wearing a veil or other fancy headwear? What sort of hairstyle are you planning on wearing today? You'll have plenty of time to explore all of your options and put together a solid plan.
Go with a short blusher or a cage veil to complement your casual attire. Choose something dramatic and magnificent, such as a chapel- or cathedral-length veil, to complement your ball gown.
Wedding footwear purchase urged.
One of the most enjoyable parts of planning a wedding is shopping for shoes. You may need some time to decide between a pair of pointed-toe pumps and an ankle-strap sandal, or you may prefer a custom pair produced by your favourite designer. Also, make sure you have plenty of time to break in your wedding shoes. After breaking them in at home for a few days, you'll be ready to party until dawn. In order to have shoes before your first fitting, the six-month mark is a great time to buy them.
Think about how high your heel is. Keep in mind that you will be spending the majority of your day on your feet. Choose timeless flats or brand new sneakers as exciting alternatives to high heels for the big day.
You should have something borrowed, something old, and something blue.
Think about whether you want blue shoes or your grandmother's clip-on earrings on your wedding day. These are the parts of your wedding outfit that will set it apart from the rest, so give them some thought early on.
Get Your Undergarments
Before your initial fitting, stock up on items to wear under the dress. The fit of your dress can be altered with the slightest twitch in your undergarments, regardless of whether you intend to wear a strapless bra, a body-slimming shaper, or nothing at all.
You'll need to select the appropriate shapewear for the event, as well as a bra that works with the back and neckline of your dress. A petticoat could be useful for adding volume to your outfit. You can also place your garter belt order now.
3 Months Before Your Wedding Day
Have Your First Fitting
In case you were wondering, "when should I get my wedding dress altered?" the answer is "three months out." Now that you've scheduled your wedding dress fitting, it's crucial that you stick to the schedule you created. Make sure your seamstress has enough time to adjust the size of your garment to your exact measurements. If you wait too long to send in your gown, there might not be enough time for modifications.
This is the step when you figure out if you need to take in or let out your dress, and if you want your hem to be longer or shorter. If the gown has a train, the seamstress will instal bustle points so that the train may be easily concealed and removed during the reception.
If you want your dress to suit you ideally, it will take at least three appointments. Each visit for modifications requires precise timing. If you get your accessories before your dress is adjusted, you risk having a dress that is too big or too little. If you wait too long to bring in your gown, there won't be time to make any necessary adjustments.
Most gowns can benefit from alterations of some kind, and while some salons have a set rate for alterations, others charge by the item. Alterations can cost anywhere from $200 for a simple hem to $1,000 or more for major alterations. Also, you won't want to forget the rest of your outfit, so don't only bring your dress.
Putting on your undergarments and shoes can give you a sense of how your dress will fit and how long it will be, and accessorising your hair with a veil or other hairpiece will help you visualise how you'll appear on your wedding day. Bring shoes of a similar height if you don't have the precise pair you'll be wearing. You don't want to trip over your dress, so keep it short.
Make sure that your wedding day ensemble, including jewellery, undergarments, shoes, and any other accessories, are as close to perfect as possible by bringing them with you.
Six Weeks Before Your Wedding Day
The Second Wedding Dress Fitting
Getting the correct fit for your wedding dress typically takes the bride multiple fittings, so factoring in extra time for alterations into your wedding planning timetable is a must. The first fitting is the most challenging part of the process. This second step is for tinier adjustments, such as adjusting the hemline, to your dress. You should take a stroll around the salon while wearing your wedding dress to check the length, fit, and alterations made since your first fitting.
Make sure there are no wrinkles, bunches, or pulls apparent throughout this fitting. Get some dance practice in while you're at the salon by strolling about in your gown. To ensure a speedy, comfortable, and correct fit, try this out (and breathe without feeling like you may split a seam). You will be in your wedding dress for at least 10 hours, so comfort is essential.
Decide on Your "Something Old, New, Borrowed and Blue"
You could wish to have these rituals done before your final fitting if you want to incorporate them into your outfit. If, for instance, you want your seamstress to add a blue ribbon or a memento pocket to the inside of your dress in addition to the other adjustments you've requested, she can do it at the same time.
2 to 3 Weeks Before Your Wedding Day
Practice Walking in Your Shoes
At home, you should strut around in your shoes to make sure they are comfortable and not too high or stiff. This way, you'll have enough time to break them in, buy a new pair or snag a second, comfier, pair.
Have Your Final Fitting
You might wish to bring a box of tissues with you to the tailor for your final fitting.
All the pieces are falling into place now. Wear waterproof mascara, because you will cry realising how close you come to being the perfect bride. At least one very close friend or family member, such as your mum or maid of honour, should be present to share in your happiness and snap a few photos for your scrapbook.
Here, you may envision how you'll look as you make your way down the aisle in your wedding dress. Bring along a friend or relative to learn the hustle and bustle with you and to help you enjoy this special day.
Pick Up Your Wedding Dress
After your dress has been prepared, you'll need to find a safe place to keep it until the big day arrives. Some bridal boutiques will even retain a gown for you up until the last few days before the ceremony. When you finally get your hands on the dress, check it out to make sure it fits perfectly. Keep it hidden from your fiance by placing it in a garment bag that allows air circulation but conceals the contents. Make sure your veil doesn't get caught on your gown's embellishments by packing it separately in plastic from the rest of your dress.
Find a Safe Place to Keep Your Wedding Gown
As important as it is to protect your dress, it is even more important to keep it a secret from your future husband or wife so that you can both enjoy the element of surprise on your wedding day. If your dress has embellishments, remember to separate your veil so that nothing gets ripped. Put it in a bag that has ventilation holes so you can check it over and make sure it's great. Alternatively, you may find it more convenient to have your wedding dress stored at your salon until the big day.
One Day Before Your Wedding Day
Gather Up Everything You'll Need
Have your accessories, including your veil, jewellery, dress, and shoes, in one spot so you don't lose track of anything. In case of emergency, you should also have a steamer and a bleach pen available. In case any of the fine fabric gets caught or a bustling point comes untied, you should also have a needle, some white thread, and some clear fishing wire available. Expert advice: bring only a tiny piece of luggage (for everything else except the outfit) to make travelling easier.
Stash Your Stuff
Get yourself a handheld steamer and a survival kit (safety pins, fashion tape), because it's always best to be prepared. Ensure that you have the entire ensemble's components together. If you're planning on changing locations after getting your hair and makeup done, it's important that every last detail matches perfectly, from your dress and veil to your jewellery and shoes.
The Wedding Day
Give Yourself Ample Time to Get Ready
That time has come, and it's now! Plan an extra half an hour into your schedule so you can change into your dress. It takes time to get into a wedding dress, especially one with a lot of straps, buckles, hooks, and other fasteners. Be calm and in no hurry.
Have a Blast
Best wishes on your big day! Some final tasks remain: First, you should steam your dress one last time and allot 30 minutes for yourself to get ready (a bridesmaid should help you). Then unwind and appreciate what's happening right now.
Keep It Or Pass It On
While the ceremony itself is finished, the bride still has to choose her wedding dress. Now is the moment to make a decision regarding the gown. You should take good care of the clothing if you intend to keep it as a remembrance. Not quite as simple as tossing it in a closet with the rest of your garments, but still not too difficult!
Conclusion
Don't procrastinate on finding the perfect wedding gown; start looking early. What would be perfect for a wedding in the fall or winter may be totally out of place in the spring or summer. What works well for a casual beach wedding might not be appropriate for a black-tie gala. You shouldn't go wedding dress shopping without a budget in mind.
Start your wedding dress buying expedition with a firm financial goal in mind. With the help of a trained advisor, you may find the ideal gown without breaking the bank. Either a physical or virtual vision board can be useful (and fun!). Wedding dresses are ordered many months in advance of the wedding date. Having too many opinions present could complicate the process of buying a dress.
Take your mum or a close friend, but no more than two or three other people, clothes shopping. Decisions and orders need to be made no later than nine months before the wedding. You should allow the designer a lot of time to make and send you the outfit. Decide how you want to wear your hair, as this is a key element of your overall look. A wonderful time to buy shoes is around the six-month mark.
Something new, something ancient, and something blue is all essential accessories for a proper wedding. Details like this will make your wedding ensemble unforgettable. The slightest shift in your bra can completely change how your outfit fits. Obtaining your dress's accessories before having them altered increases the likelihood that you will end up with an unflatteringly large or small dress. Planning on having your wedding dress altered? You should allow plenty of time in your schedule.
While some salons provide flat pricing for modifications, others charge on a per-item basis, and this can add up quickly for dresses that need multiple changes. Pricing for adjustments varies widely, from $200 for a simple hem to $1,000 for significant alterations. Here, we take a peek at your potential appearance as you walk down the aisle in your wedding attire. Allow yourself half an hour before your event starts to change into your outfit. Invest in a portable steamer and an emergency supply kit (safety pins, fashion tape).
Make sure you have all the parts of the ensemble handy. Take only a carry-on bag, as it is the recommendation of experts (for everything else except the outfit).
Content Summary
- If you want your wedding dress to be a perfect reflection of you and your vision, you should start looking early.
- Knowing the season of your wedding is essential in planning your outfit, as an item that is perfect for a wedding in the fall or winter may be entirely out of place in the spring or summer.
- The only way to become ready is if you have a set date.
- Knowing where the wedding will take place is very important.
- Alternately, if you've always pictured yourself in a specific wedding dress, you can flip the traditional timeline on its head and allow the dress choose the date and place.
- Simply put, there are no hard and fast rules on what to wear to your wedding.
- Plan out how much you can spend on your gown and accoutrements.
- Once you have selected a figure for your wedding expenses, decide how much of that sum will go towards the dress.
- It's devastating to envision yourself in love with a wedding dress that you can't afford.
- Start your wedding dress buying expedition with a firm financial goal in mind.
- Determine your prefered style before hitting the stores.
- Having a specific dress style or silhouette in mind is not required before beginning your search, but knowing what you like and don't like in a dress will make your experience much more productive.
- It's fine to go clothes shopping with your mum or a close friend, but you shouldn't bring more than two or three additional individuals.
- You will need to start looking for your wedding dress early because it will not be something you can buy at a store.
- The salesperson at the bridal shop can better assist you if you bring images of the garments you prefer.
- Consider bringing as few people as possible with you.
- If you need to get some groceries or clothes, you might want to try stepping out on your own.
- Since you'll be making multiple trips, you can take different people each time.
- Find your ideal fabric and silhouette by comparing options while you shop.
- Examine your preferences by trying on gowns made of different materials and designs.
- The time to make a choice and place an order has come.
- And while nine months out might sound too early, it's not; wedding dresses are generally custom ordered, so you'll want to give the designer plenty of time to make and ship the dress, as well as allow for modifications, which are necessary for almost all wedding dresses.
- Signing a contract and placing a deposit equivalent to about 60% of the total cost of the garment is the normal procedure when buying a gown.
- You've made your dress selection in advance, which is perfect.
- You can take your time considering your choices and developing an effective strategy.
- It is very recommended that you buy new shoes for your wedding.
- Shoe shopping is a highlight of wedding preparations for many.
- In addition, give yourself plenty of time to break in the shoes you plan to wear on the big day.
- When you reach the six-month mark, it's a good time to buy shoes so that you can have them before your first fitting.
- Remember how high your heel is.
- Remember that you will spend a lot of time on your feet today.
- You should give some thought to whether or not you want to wear blue shoes or your grandmother's clip-on earrings on your big day.
- Get plenty of undergarments before you go in for the first fitting.
- The correct response is "in three months."
- Now that you've set a date for your wedding dress fitting, it's vital that you keep to the timetable you've established.
- Allow your seamstress plenty of time to make the necessary alterations so that your clothing fits you perfectly.
- It will take at least three fittings to get the dress to fit you perfectly.
- Obtaining your dress's accessories before having it altered increases the likelihood that you will end up with an unflatteringly large or small dress.
- Bring the rest of your ensemble; the dress isn't enough.
- You may get a feel for the length and fit of your dress by trying it on with your underwear and shoes, and you can practise your hairstyle with a veil or other hair accessory to see how it will look on your wedding day.
- Be sure to include all the pieces you'll need to complete your wedding day look, from jewellery and underwear to shoes and a veil.
- It's the last six weeks before the big day, and you're still not married! It usually takes the bride many fittings before she finds a wedding dress that is the perfect size, so it's important to provide plenty of time in the wedding timeline for adjustments.
- Most of the work is done during the first fitting, however it might be difficult.
- Take a walk around the salon in your wedding dress to double-check the length, fit, and modifications that have been made since your first fitting.
- Walk around in your gown and do some light dancing while you wait for your appointment at the salon.
- It's important that your wedding dress is comfortable because you'll be wearing it for at least 10 hours.
- You should walk around the house in your shoes to make sure they are the right height and aren't too stiff.
- Take a box of tissues with you to the tailor with you for the final fitting.
- Invite a loved one to share in the excitement and learn the ropes with you on this momentous day.
- When your dress is all done, you'll need to put it away somewhere secure until the big day.
- Even if it's the final week before the wedding, some bridal salons will hold onto the dress you've chosen for you.
- Pack your veil in plastic wrap away from the rest of your dress so it doesn't become tangled in the details of your gown.
- If you want to retain the element of surprise for you and your future spouse on your wedding day, keeping your dress a secret is just as crucial as keeping it safe.
- It's important to remember to split your veil in two if your dress has any embellishments to prevent ripping.
- Alternately, you can have your wedding dress kept safe at the salon until the big day.
- Get ready for the big day by getting all of your essentials in order the day before.
- Keep all of your wedding day accessories, such as your veil, jewellery, dress, and shoes, in one convenient location.
- In order to make travelling easier, professionals recommend only bringing one small suitcase (for everything else except the clothes).
- Make sure you have all the parts of the ensemble handy.
- Even after getting your hair and makeup done, you shouldn't change locations without making sure that every little aspect of your outfit, from your dress and veil to your jewellery and shoes, is in perfect harmony with one another.
- Take your time and get ready. This is the time!
- Allow yourself half an hour before your event starts to change into your outfit.
- Putting on a bridal gown, especially one with multiple straps, buckles, hooks, and other attachments, is a time-consuming process.
- Don't panic and take your time.
- We hope that your special day goes off without a hitch.
- There is still work to be done: First, give yourself 30 minutes to get ready and steam your dress one last time (a bridesmaid should help you).
- Even though the wedding is over, the bride still needs to pick out a gown.
- It's time to make a choice about the dress.
- If you plan to retain the clothes as a memento, you should treat it with respect.
Vines of the Yarra Valley Blog

Why You Should Consider A Garden Wedding Venue
Amidst the whispers of nature, where every leaf and petal unfolds a story of beauty and serenity, lies the perfect setting for the beginning of a lifetime together. With their inherent charm and splendour, garden weddings offer a sanctuary for the couple and every soul fortunate enough to be part of their union. In a […]

What equipment do I need to DJ a wedding?
Late nights combined with the occasional significant technical blunder can be exhausting, therefore you must have the correct mindset and physique for the work. We believe that the benefits outweigh the risks of being a wedding DJ. What’s wonderful about becoming a wedding DJ is that there’s always a need for them. But before you […]

How To Ensure Guest Comfort At Your Outdoor Wedding?
Imagine exchanging vows in the soft glow of the setting sun amidst the warmth of your loved ones and the gentle whispers of nature. Outdoor weddings are the epitome of romance, offering an enchanting backdrop that feels lifted from the pages of a fairy tale. Yet, amidst this idyllic setting, the comfort of your guests […]

Where Is The Best Venue For A Boho Wedding In Mexico?
To see true beauty in Mexico, you must travel to Tulum. To any couple who appreciates the finer things in life, this Mexican fishing village on the Yucatan Peninsula is a sight to behold. Tulum is a favourite wedding destination because of its picturesque ancient ruins, cultural subtleties, and some of the best beaches in […]

45+ Best Accommodation and Hotel in Burwood, Melbourne (2024)
While many consider a luxury holiday to be a visit to a faraway land, there is a rising getaway trend that requires little to no travel at all. Known as a ‘staycation,’ travellers are opting to explore their own backyards before booking a vacation abroad. With our busy work schedule, we thought a staycation would […]

20+ Best Dance Class Studios in Melbourne, Victoria (2024)
There’s something about grooving to the sound of music that seems to take all of our cares away. Maybe it’s the rhythm of your favourite tunes or the heart-pumping workout that gets you up and off the couch. Or perhaps it’s the challenge of mastering the more complicated moves that brings you so much joy. […]

Why Should You Consider Hiring a Day-of Wedding Coordinator?
A day-of wedding coordinator is crucial since the happy couple should be able to relax and enjoy themselves without worrying about the event’s arrangements. Having a coordinator on hand the day of the wedding is one of the most popular new developments in wedding planning. Many wonderful things can happen on the day of a […]

How To Plan Wedding Transportation For Your Guests?
Planning a wedding is never easy, and neither is figuring out how to get your guests there and back safely and comfortably. There are numerous moving parts, so careful planning is required to ensure that everyone arrives at their destination on time. In this piece, we’ll discuss some of the most important factors to consider […]

How to Clean Your Silk Wedding Dress?
What are the benefits of wearing a silk wedding gown? Stunning in appearance and soft to the touch, silk is a luxurious textile choice. Even though it looks fragile, it’s actually quite strong. Natural insect cocoons are constructed from a fine, durable fibre produced by the larvae of specific insect species. Our silk dresses are […]
